There are as many different ways to do this as there are replacement light options available on ebay (about 300, last I checked).
But here is the real trick that you've been looking for.
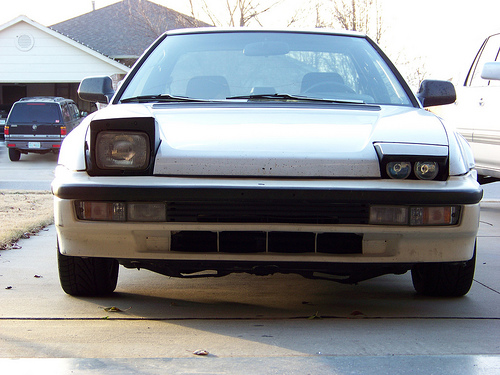
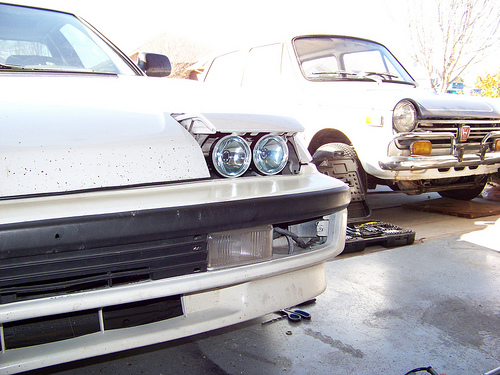
First, look at your car and decide what kind of lights you want to use in place of the stockers (or...if you like pointing you stockers into the ground.....don't). Buy them. Take them home or to your shop.
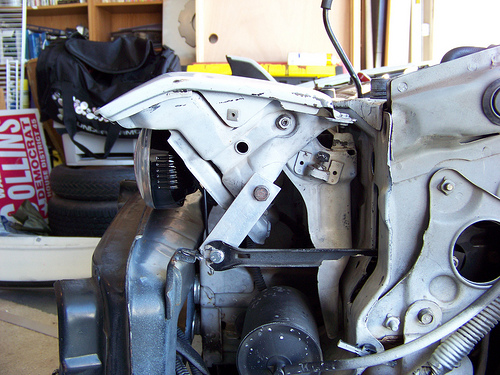
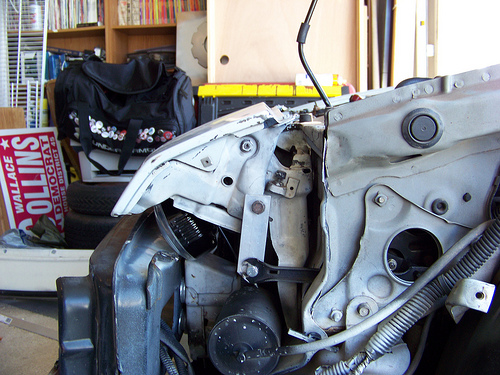
Second, remove everything that isn't going to be on the car when you are done...as well as the bumper and fender.
Third, figure out how much lift you are going to need to get your new lights up from behind the bumper.
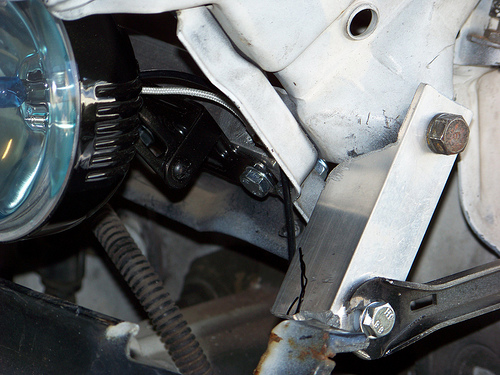
Fourth, drill out or grind off the rivet that is holding the actuator arm (that black stick thingy) to the headlamp assembly. Make sure you get all the parts out of there, you'll need some of them later.
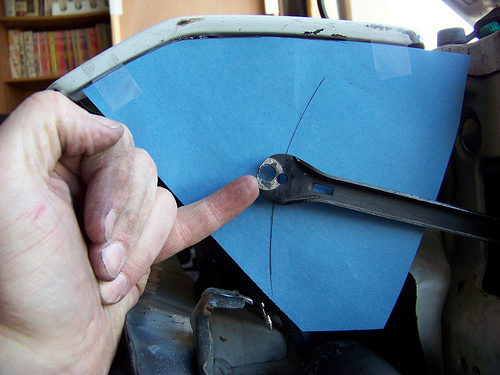
Fifth, find some heavy paper and trace your headlight garnish, and tape it to your headlight cover.
Sixth, with your headlamp closed and the switch on the dash in the closed position, stick a pen in the hole in the end of the actuator arm and draw an arc on the paper. this arc represents every possible location you could attach the arm and still have the assembly close where it is supposed to.
 don't mind that big hole towards the end of my arm, it probably won't be there on yours....that is a previous owner's/shop's attempt to fix a bent something.
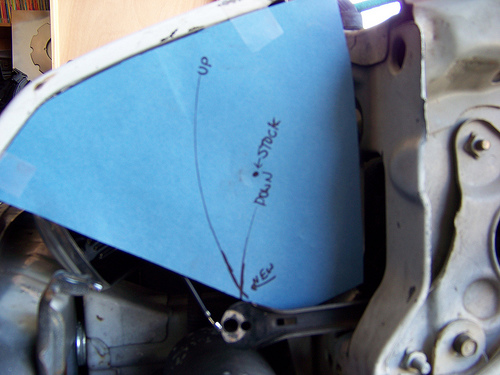
Seventh, with your headlamp open the desired 'lazy' amount and the switch on the dash in the open position, stick a pen in the hole end of the actuator arm and draw another arc on the paper. this arc represents every possible location you could attach the arm and still have the assembly open where you want it.
Eighth, if your two arcs did not cross, you will need to extend them until they do. If your ca
r is getting in the way (the arm hits the front bulkhead), you can extend the cut straight down until you have the clearance you need.
Ninth, see that point where the arcs cross? That's the point you want the arm to attach to, now. Remember, that point is both open AND closed at the correct places.
Tenth, build a bracket to move that actuator arm attachment point. I made mine from 1" x 1/8" aluminum angle, the same stuff I used to attach the new lights to the headlamp assembly.
Eleventh, find a normal
honda 12mm head nut and bolt (8mm shank), and grind down the bronze bushing from the old attachment point smooth with the headlamp assembly. Bolt your new bracket down tightly, you don't want it moving there.
Twelfth, find a nut and bolt to attach the arm to your bracket. Put a couple nylon or bronze washers in between them so they won't bind. You might have to make small adjustments to make sure nothing binds up. I'm not opening mine very high, so my bracket is pretty long. That made the arm bind up with the motor bracket behind the bulkhead. I notched the arm to let it clear. Just unplug the motor and run the knob by hand until you are sure everything is happy. Then plug the motor back in the run the knob by hand a little, and it will cycle by itself.
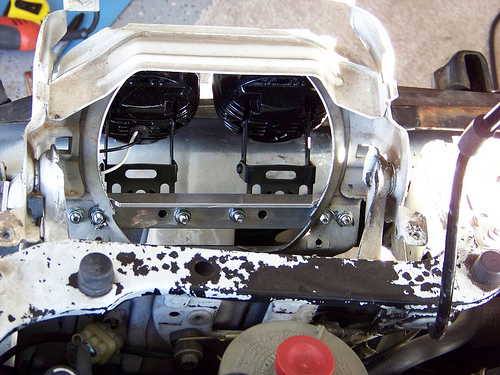
Thirteenth, install your lights. I used about 4' of that same 1" x 1/8" aluminum angle and 20 6mm nuts, washers, and bolts (10mm head). It all came from Lowe's and cost less than $20. my lights are cheep $20/pair driving lights from O'Reillys. I spent about 4 hours per side.
So there you go, it's not magic, it's geometry.