Motor/Tranny Install and Other Engine Bay Work
Link to this page:
BACK TO PRELUDE3G.COM HOME
First I will assume you have already removed the old engine/tranny, radiator, and front cross member.
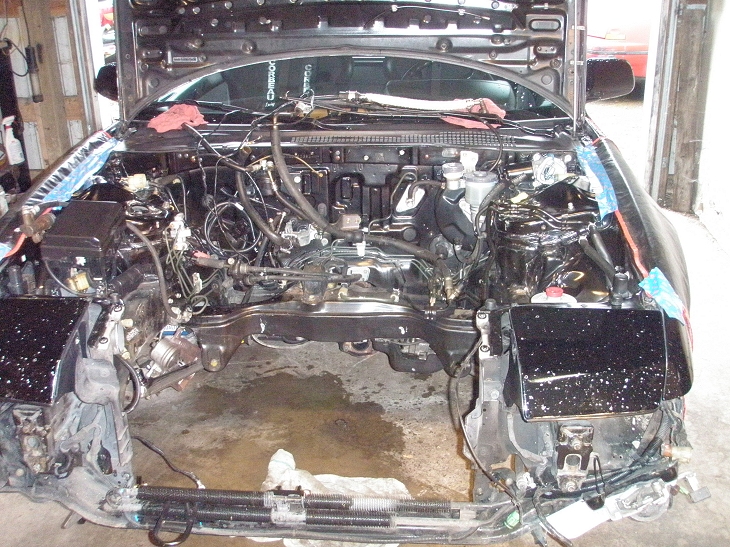
What we start with:
First step is to prep and install your new shifter cables.
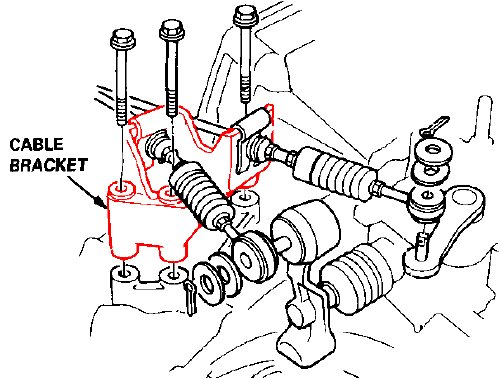
Begin by making sure the transmission side cable bracket does in fact match your transmission. Swap it if needed:
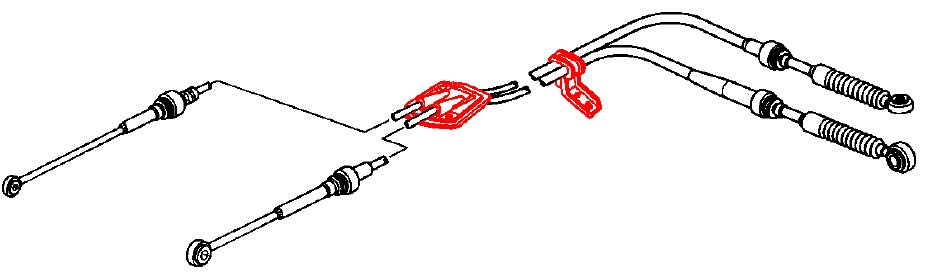
Next remove the metal bracket at the middle of your new cables then remove the metal bracket on the interior side of the cable and use a razor to cut off the rubber seal portion. You should end up with bare cables except for the tranny side bracket from the picture above:
Next cut a slit down the middle of your stock cable bracket and twist it so you can remove it from your stock cables. Do a similar thing to the rubber seal under the bracket. Refer to the following picture:
After this it's easy to install in reverse order onto your new cables. Finally slide the cables into position and tighten the bracket.
If you're keeping power steering install the hybrid hose you got from 1funryd now.
Before putting the H22 in you should install your Rywire or Wireworx harness onto it.
Additional for the Rywire harness only:
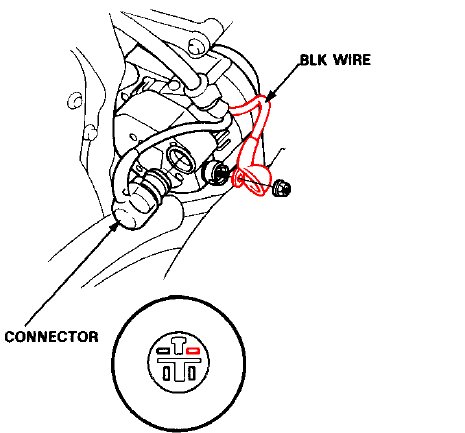
You need to run the large power wire that goes from the alternator post to the fuse box, if you cut the stock one out of your old harness it can be reused. Next you will notice the green plug on the alternator is missing one pin, this is the wire for the charge warning light in the cluster. De pin this wire from your old harness connector and stick it into the Rywire plug. Now just run it with the large alternator wire you added to near where the fuse box is:
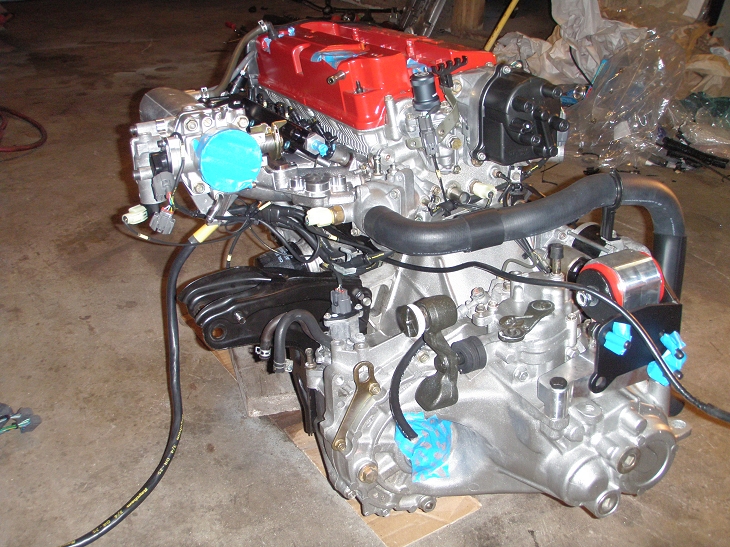
Here is the Rywire harness installed. The harness leaves the motor just above the rear mount bracket and also the large alternator wire goes over towards where the fuse box will be. If you're using the Wireworx harness it should be similar to the stock harness with two big connectors that go up to the shock tower:
If your mounts came with new transmission side bolts remove the stock studs on the casing:
Remove the crank pulley for now, this gives you more room when dropping the motor in.
Finally install the rear engine mount onto the rear cross member.
You should be ready to put the H into the car at this point.
The only mount brackets that should be on the motor right now are the stock rear bracket and the stock driver side bracket that goes under the timing cover. Pick the motor/transmission up with your engine hoist with the transmission end a little lower than the crank pulley end. Lower the H into the bay but keep going so the transmission side is hanging lower than it needs to.
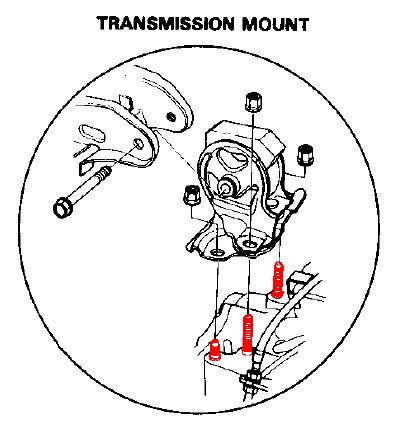
Install the transmission side mount onto the transmission and the mount bracket onto the chassis. Raise the motor back up so the tranny mount slips into the bracket, line up the bolt hole and stick the bolt through the mount. While you're doing that you should also be making sure the rear bracket is lining up with the rear mount. If you need to keep the mount bolts loose so it can be shifted around a bit, do so. Stick the bolt through the rear mount once it's lined up.
Move to the drivers side mount and install the mount and chassis bracket. It should be pretty close but use the hoist to lift or lower the engine until you can slip the bolt through the mount. Now you can tighten all 3 mount bolts and remove the engine hoist:

Install the crank pulley and also the P/S and alt. belts.
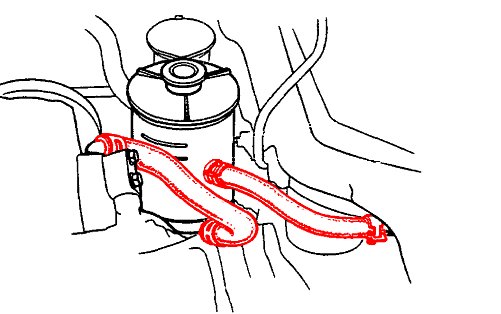
You will notice the P/S reservoir is close/touching the P/S pulley. What I did was remove the mount bracket and reattach it 1" more to the drivers side using tapping screws.
If you do that you will need to get a longer P/S pump feed hose and a longer hose that goes to the P/S cooler:
Install the traction bar at this point. When you install the front torque mount adjust it so there is a very slight tension between the bar and motor.
Install your axles and put your suspension back together.
Now is a good time to install the header and down pipe.
Reinstall the radiator and front end. For radiator hoses I used the stock H22 ones. I needed to trim the top one a little bit so it didn't have a kink.
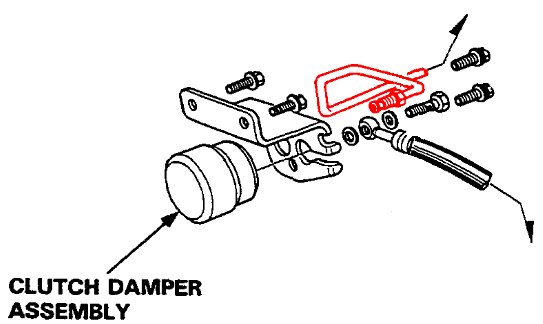
Bolt the shifter cable bracket to the transmission and attach the cables to the shifter arms. For the clutch soft line you will first need to remove the metal bracket that is on the 3G line by bending it off. Next route the line back towards the cross member, towards the drivers side, then forward to the fitting on the tranny. You can route it other ways if you want as long as it doesn't interfere with the shifter cables or axle.
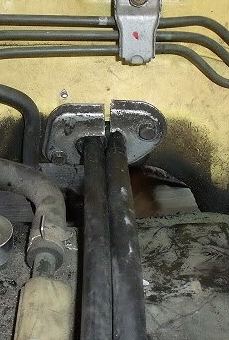
Finally you will notice part of the clutch hard line is touching the shift arm in some gears. You need to bend this line slightly so it doesn't touch:
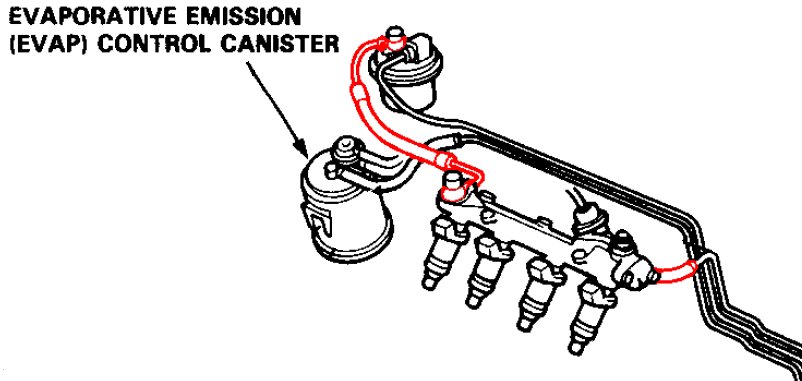
Install the fuel feed line just reuse the stock 3G one. Some H22's come with a fuel rail that has the pressure line attach on the drivers side. If this is the case on yours you will need to get a different rail since the pressure line wont be long enough. Install the return line next. If you still use the charcoal canister hook the large red line coming from it to the big port on top of the throttle body just like it was with the B20a/B21a:
Install the brake booster hose. Depending which manifold you go with you may need to get a longer hose to go between the manifold and check valve. (I did with the euro-r manifold.)
Install the throttle cable. Have someone push the pedal to the floor then try turning the throttle rotor more by hand. If you can still turn it you know the cable needs to be adjusted tighter.
88-89 do this next:
Making 88-89 Cable Speedo Work
Once finished come back and continue.