Fixing Rust Spot By Gas Door
By: LudaPower
(From: http://www.preludepower.com/forums/showthread.php?t=211796)
Link to this page:
BACK TO PRELUDE3G.COM HOME
So you wanna fix your rust eh? This shows the basic jist of doing it correctly.
Tools needed: Lots of tools.. I wont go through everything because if you intend to tackle something like this then it means you have the resources.. or your just anxious to get rid of the rust
I used a 110V Lincoln mig welder (flux) for the job.
You this at your own risk.. If it looks like ass or you blow your ass up, it is in no way my fault.. Welding near gas is safe.. NOT! You'll blow your ass like I said.. take the necessary precautions and use the right safety equipment.. I wore glasses and gloves the whole time (well maybe except sanding) and obviously wore welder gloves and mask. When you do weld.. Don't just close your eyes when spot welding.. Your face will feel the consequences the next day.. trust me.
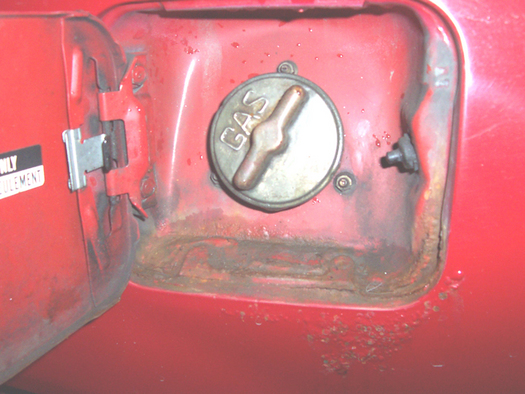
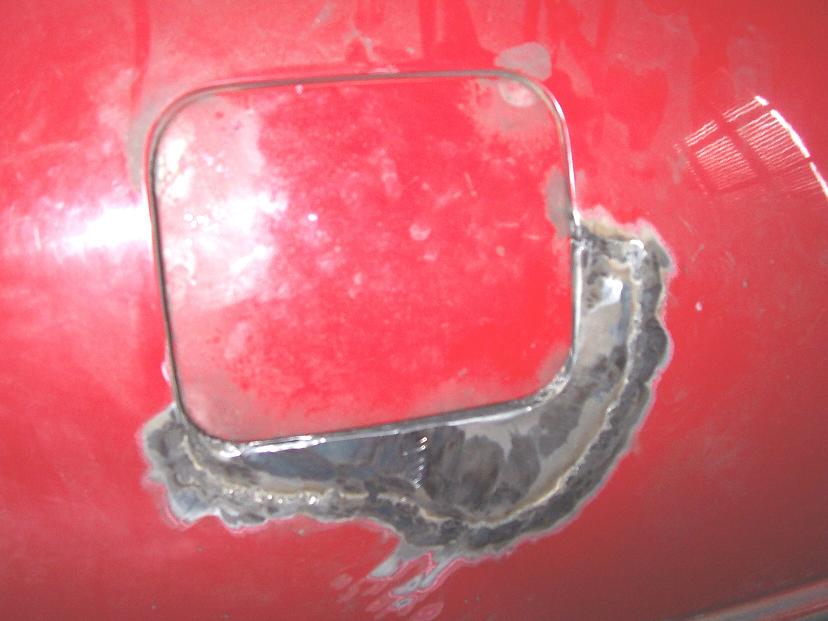
Before:
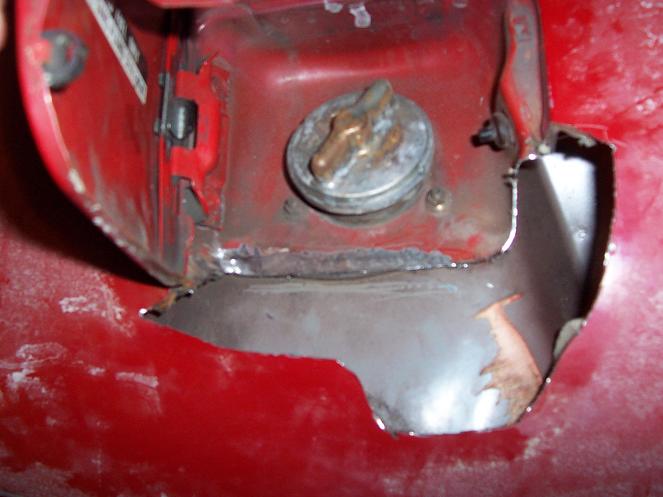
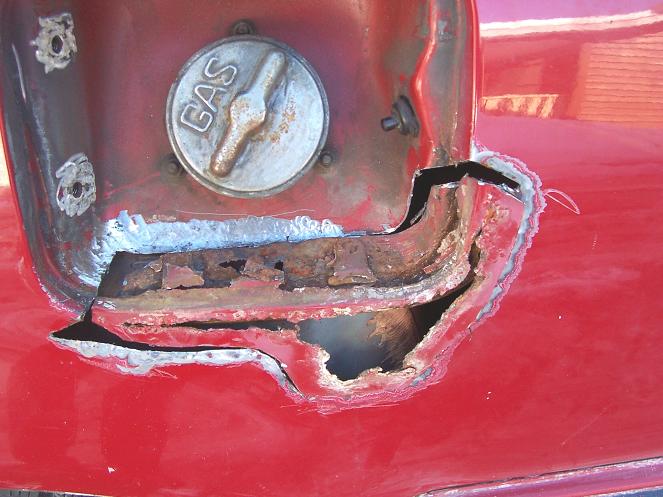
Cut out the rust (dremel works best)
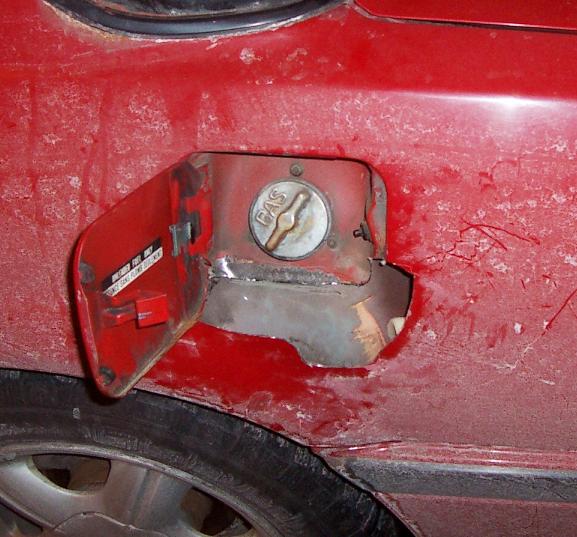
Be sure to get ALL the rust out.. check the back and the corners.. you don't want it to come back.
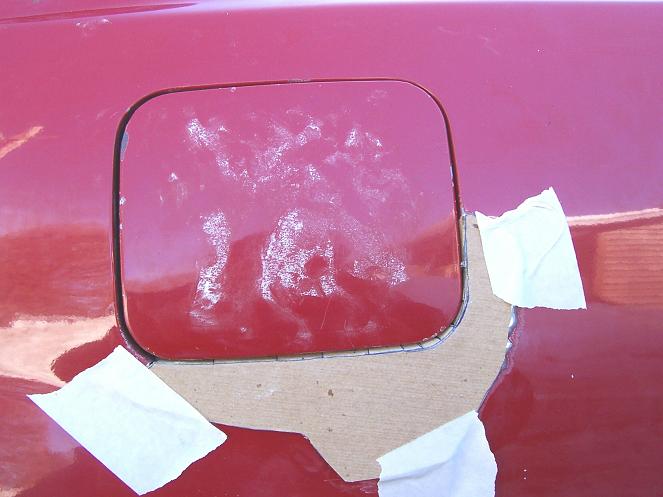
Now your gonna want to make a template out of something like cardboard.. this one sucks though.. I was going to use stainless steel for the new piece. It would work for stainless.. but the problem is you need to weld with stainless.. you cant just use steel flux wire. The other problem is paint doesn't adhere well to stainless because its such a hard metal.. you'll also have a **** of a time bending it as I did.. and cutting it.
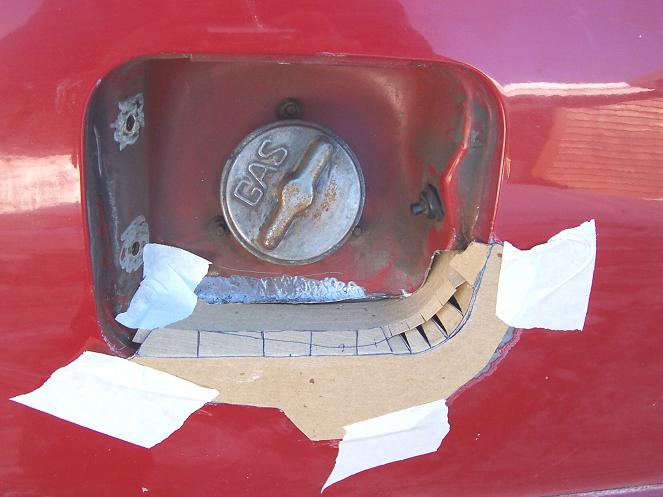
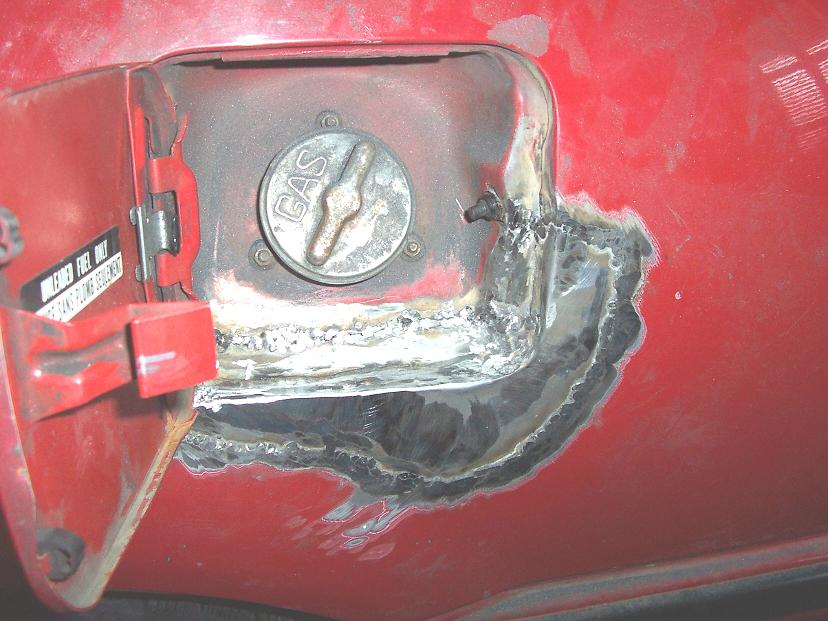
Just to show how bad the rust really was..
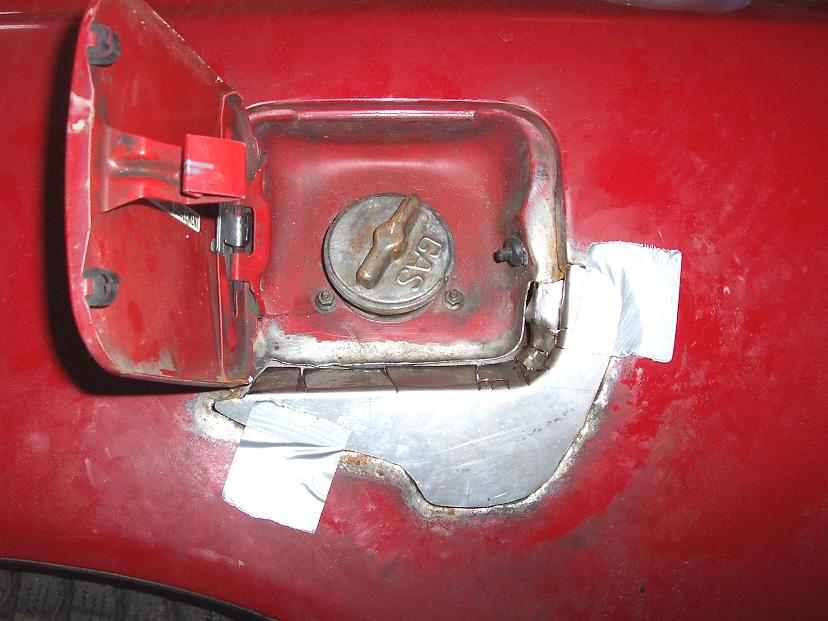
Here is a piece I made out of stainless.. don't use stainless I don't recommend it.. it'll just make your life harder. Notice how I had it so the piece sits on top of the body. This isn't a good approach.. its what I was suggested but learned by my body shop guru that the best way was to have the piece in back of the panel.
This is 22 gauge mild steel.. this piece was made out of 4 pieces in total. There's the big front piece you see with the edges.. and then there's the flat piece.. corner piece.. and the top right piece with the bend in it. I would place the pieces how I wanted them inside and mark them.. then id take them out and spot weld them. Test fit to make sure the pieces go where you want then you can completely weld the piece together. You can fill as much of it as you want and since it'll be off the car it will be a lot easier. Then you just grind down the welds as best as possible.
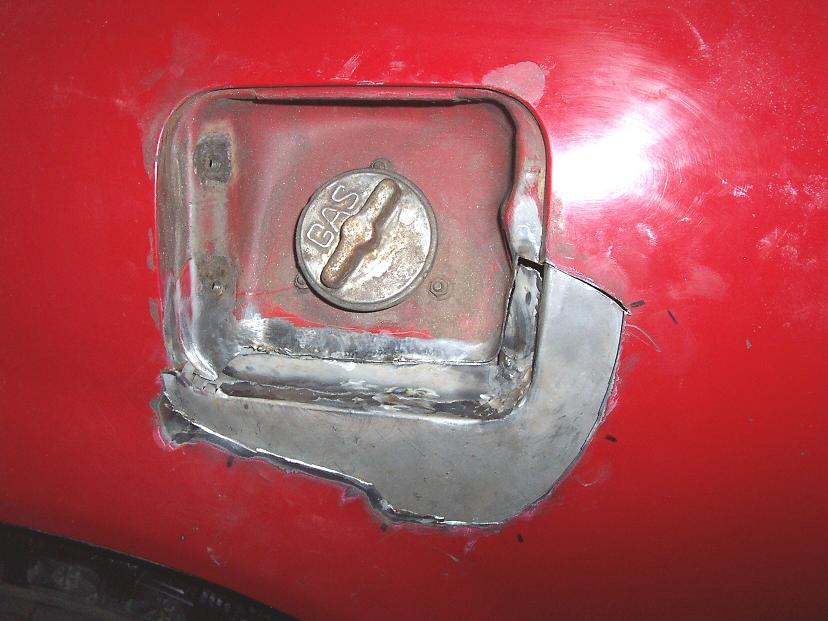
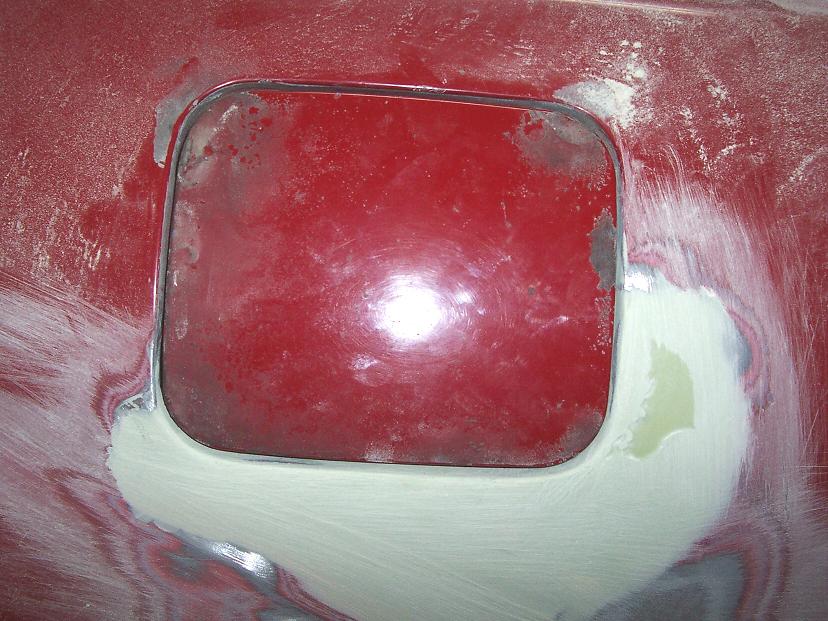
Again the piece is in back of the body panel.. you don't want any high spots whatsoever.. Everything has to be lower than the original body panel or well it'll look like **** when done.. Filler fixes all the rest.
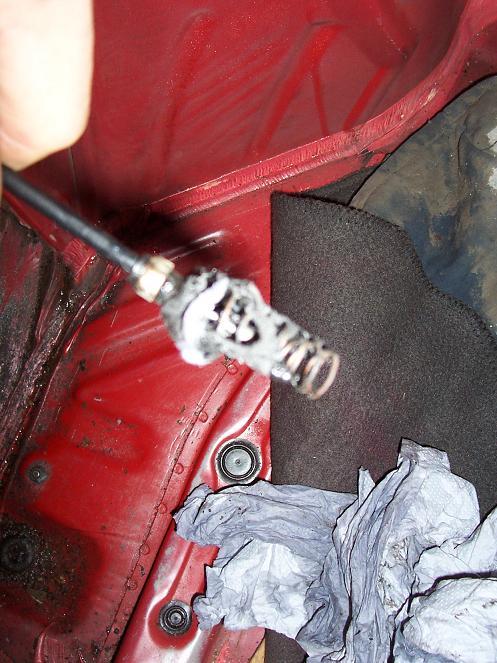
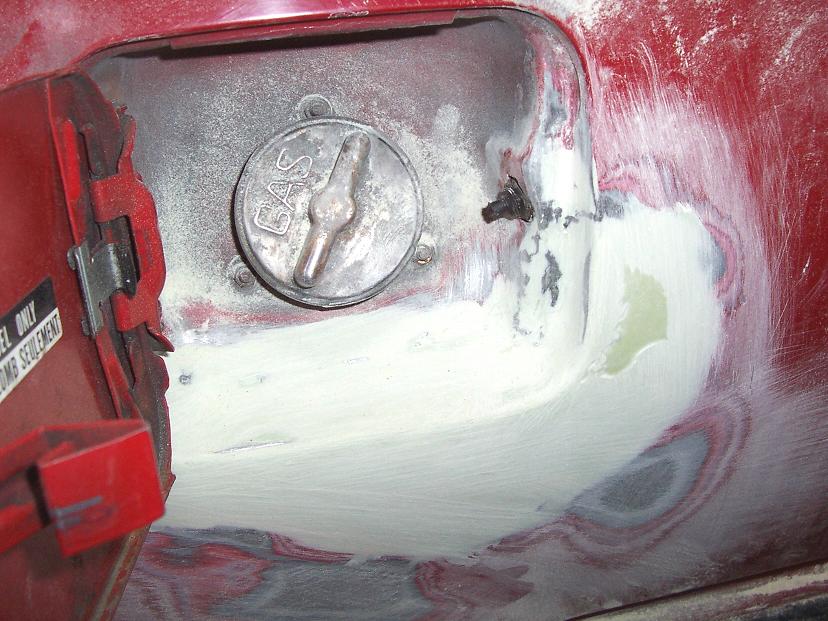
Here it is all welded up again to the body.. you probably thought of it already but.. this is very dangerous and if your not feeling up to it then let a body shop do it for you.. or ask for some help from someone with experience. Welding near gas isn't the best idea. The gasoline is such a problem.. but the vapors are. I put a wet rag underneath the gas cap (inside). Best thing to do would be take out the gas tank all together if you wanna be really precautions.. don't blame me if you blew up.
Remove the gas door popper before welding or it will melt!
Everything was welded in so i started on the filler.. I use Gold filler
(gold is brand name).. it works great. Good luck getting it to look
exactly as it did before.. you really need experience and talent to get
this right.
MustardCat's filler tips:
Get a long, rigid sanding board (NO elec. or air sanders!! Or plastic sanding boards) at least 12" long. (I'd prolly use a 17" one) Take off the gas door and use 80 grit paper with the board. Apply more filler then you need, over a larger area than your filling. (You don't want any low spots in the filler)
Once the filler is reasonably hard start sanding, the trick is to change directions. So first you sand left to right for like 10 passes, then you switch and sand up to down for another 10 passes, then switch again and go top left to bottom right (Diagonally) 10 passes, then top right to bottom left 10 passes. After that start over at left to right and just keep repeating the process. This will keep the filler even and not create any low spots. (Hopefully)
You also need to sand past the filler when doing this, so start with the sanding board off to the left of the filler then go across over the filler and stop when the board is to the right of the filler. You do this is all directions, this helps keep the filler level with the rest of the body.
Also, when sanding only use very light pressure on the sanding board, you want it gliding over the surface. If you push hard it going to dig in and the filler will wind up being low in the middle. So when the sand paper stops cutting good, don't pusher hard to make it work, just switch to new paper.
Well if you follow these steps and take you time you should be able to get the filler almost perfect. When it looks like its getting close, stop, wipe off the area with clean rag and then feel it with your hand you should be able to feel low or high spots. If the filler is almost perfect but there are a still a few inconsistencies, don't try and sand it more to take them out, read on.
Now you need to buy some glaze, here and example pic:
It's pretty much really thin body filler, and goes on the same way. Apply a thin coat of this stuff over the whole repair area. Now switch up to like 180 grit paper with your board and sand like before, now this is going to be the last coat of filler (Hopefully) so go over it real lightly and take your time.
Now the repair should almost be perfect, but there is one more sanding step. Buy a cheap can of spray paint that has a contrasting colour to your repair area. (If the filler was white, get black paint) Mist a light coat of it onto the repair area holding the can like 2' away. You don't want to coat it, just mist it so there a hundreds of tiny paint dots on the entire repair area.
Now take the sanding board and 180 grit paper, and very lightly sand the area again. If you have a high spot you will start to see a spot where the misted paint it gone off the surface but around it the paint is still there. Low spots will be areas that still have the misted paint on them, while the area around it was already sanded off. If you have any severe low spots then more glaze will be necessary, if the low spot is barely there then thick high build primer will usually fill it.
Ok after all that the damaged area will pretty much be fixed. Now you need to decide if you want to try and paint it yourself, or have a body shop paint it. If your just going to primer it and have a body shop fix it in the future, use waterproof primer like rustoleum so moisture doesn't go through and get into the filler. Just don't let the filler get wet at any point and you will be ok.
Obviously I was still working through it
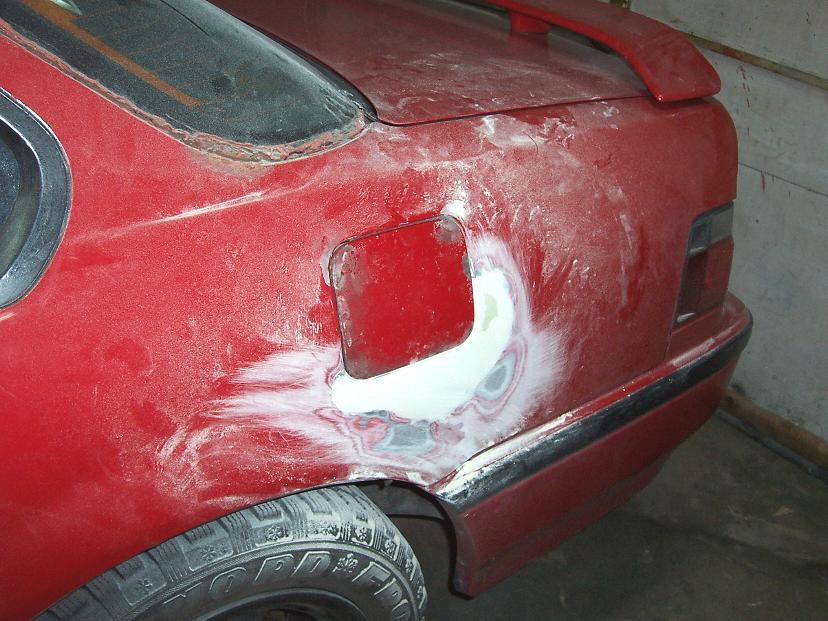
You can see some imperfections in it but it was sunday and I had school the next day so I tried to hurry it a bit. Also I realized after numerous try's to get it right.. I wasn't able to. So before breaking something I just stopped and left is half bad. Before applying primer you wanna sand with max 320 grit. I was told to sand 180 grit and the filler primer would cover the rest.. this was false and well I can still see the scratch marks. Then wet sand the primer with something like 600 grit.. make sure its very dry (the primer) before sanding.

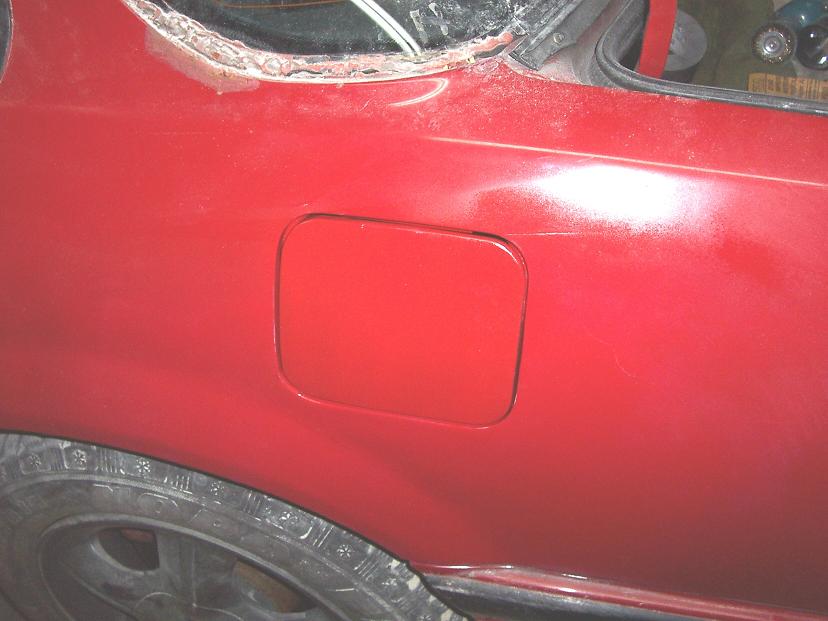
Here it is after painting and clear coating.. barely shows.

This was my first time fixing rust like this and I hope I helped some of you.