LudeSpeed Cold Air Intake
By:
Tom Coleman
![]()
Link to this page:
This intake is no longer made but I'm leaving this up for anyone who may want to make one in a similar fashion.
This page will serve as both install instructions for people that order the turbo kit with the cold air option, and a guide for enthusiasts that just want to put a cold air intake on their car. The 92+ Prelude comes with a hole in the body for the intake from the factory. Their battery is also turned longways so it is not in the way. So they have it easy. The gen3 Prelude has the battery sitting on the only possible location to install the cold air so it needs to be moved to the trunk. That is a another job altogether and I will have pics of that soon.
Step - 1
Pull the bumper cover off. Then you want to remove the radiator coolant tank.
You can relocate it if you like, but it is a weird shape and will be hard
to mount inside the engine compartment. Another option is to get a 92+ Civic
reservoir. They are nice and small and mount nicely in the engine compartment.
the pic below is the coolant bottle before removal.
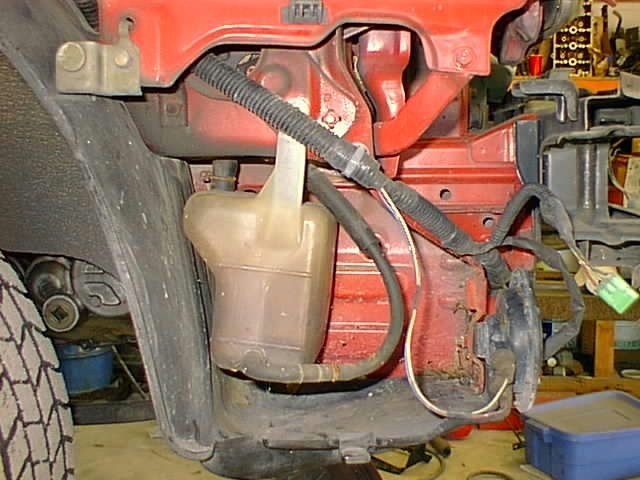
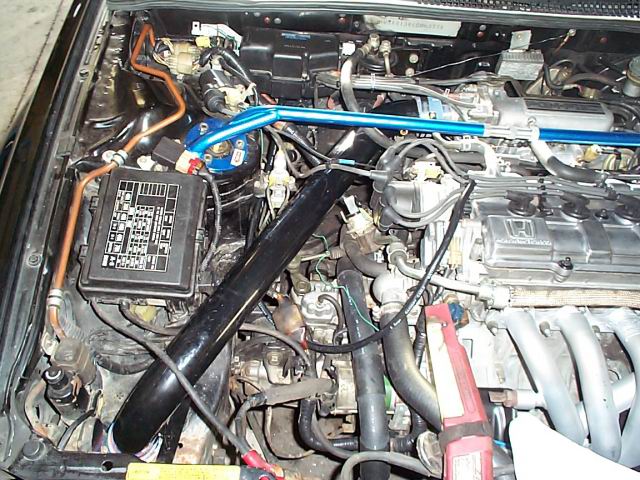
With the bottle gone, you have a nice space for the filter to sit in.
Step - 2
Make a scoop to get the air to the filter. If you are worried about getting
water into the filter, go to the next step. I felt that if the filter was
going to be in the bumper cavity, there should be a scoop in the bottom splash
gaurd to get the air to the filter. So you want to mark out what you are going
to cut. you are going to need a 'U' shaped bracket to hold the flap down to
create the scoop. Use the scoop bracket to help determine what size the holeneeds
to be. I used a box-cutter style razor to cut the urethane splash guard. The
box in the pic needs to be completely cut out. The two other lines just need
to be cut so they create a flap that will bend down.
If you do not have a way to make the 'U' shaped bracket, you can just cut an opening to let fresh air in, you just won't have the scoop. If you need a bracket, let me know and I will sell you one for $25 with the necessary hardware.
The pic below shows the splash gaurd after it is cut.
The pic below shows the bracket installed. This bracket is a sloppy prototype,
the new ones are much neater.
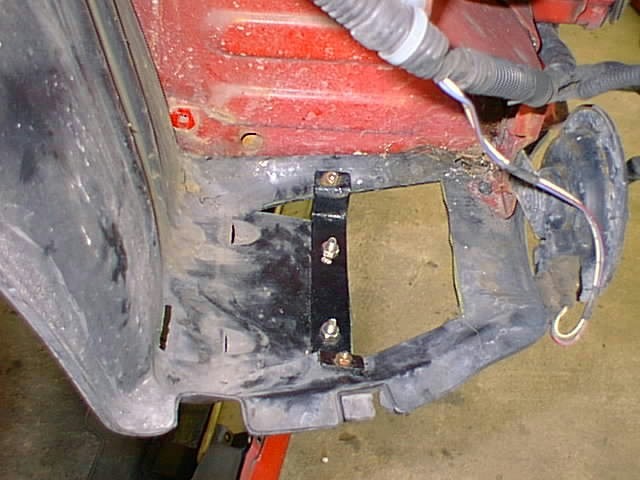
The next pic is a front view of the completed scoop. It sticks down about
1.5 inches and I am sure it gets alot of air in there at any speed above 30MPH.
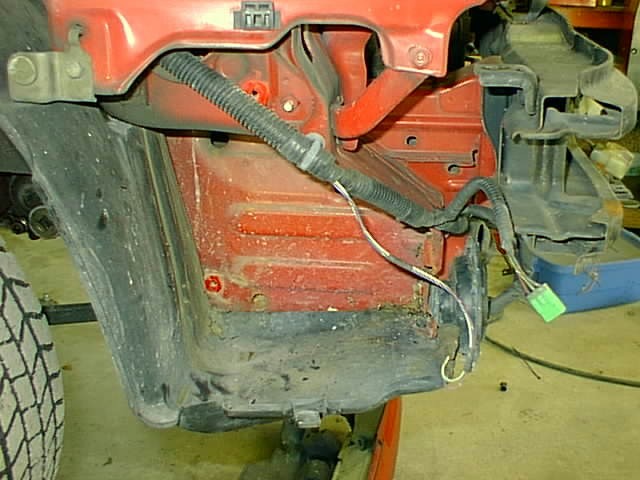
Step - 3
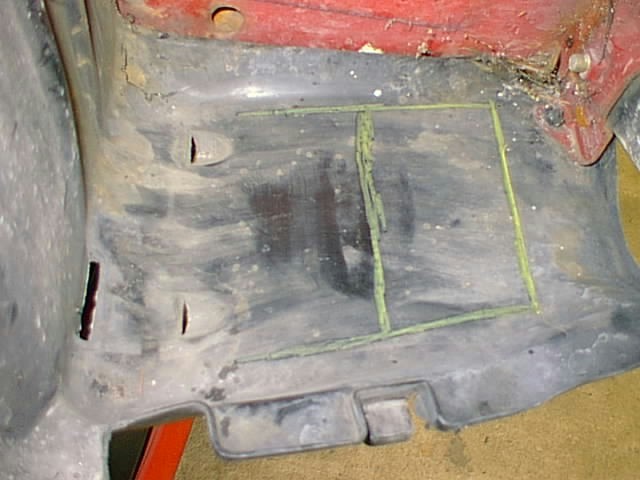
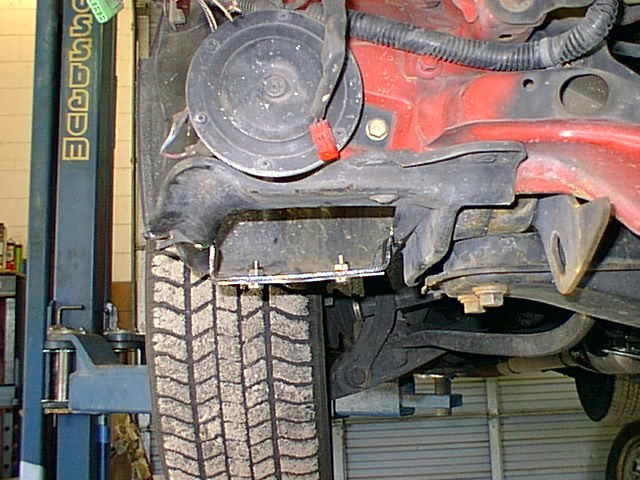
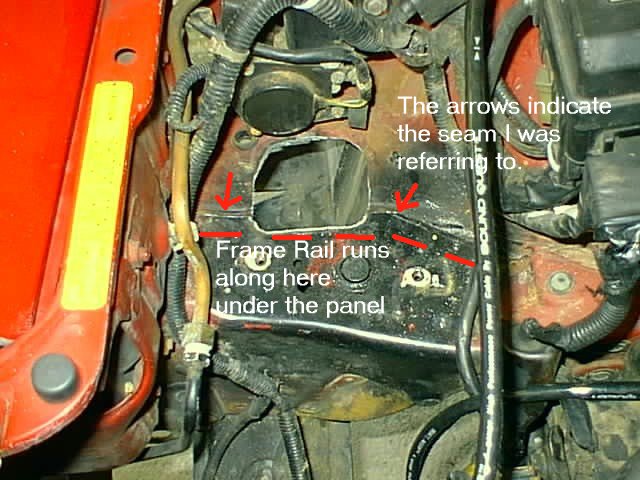
Now comes the tricky part: cutting the hole. There is a seam in the body in
the middle of the flat area under the battery. You can cut NO MORE than 1
inch on the inside of the seam because the frame rail starts about 1 1/2 inch
from the seam on the underside.
If you want to print out a template that you can use to help you cut the hole,
CLICK
HERE (You need MS Office Word to open this, wordpad that comes with windows will not work.) Just print it out and follow the directions.
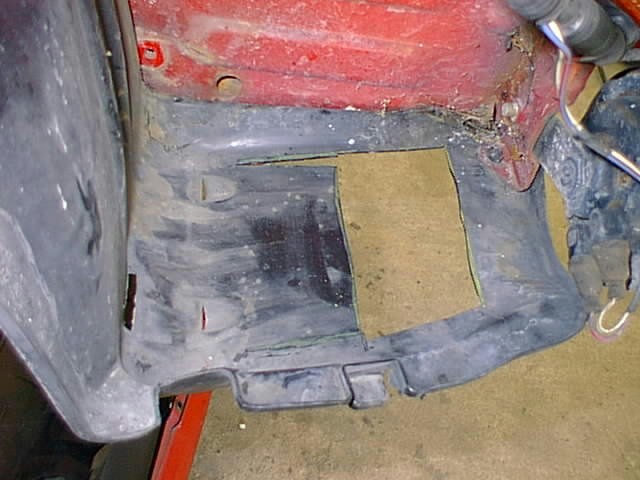
There are a couple ways to cut the hole. You can use a torch, a small reciprocating
saw or a 3 inch holesaw. If you use the holesaw, be sure you have a heavy
duty drill or you might damage it. Be sure to use the picture below as a reference
to where the hole needs to be. If you are using a saw, you can start with
a small hole and then look on the underside to see how large you want to make
it. Then keep trimming it until you get the desired size and shape. You can
make it whatever shape you want, just make sure you test fit the pipe before
deciding that you are finished. To hide the rough edge of the hole, you can
take a piece of vacuum hose and cut a slit in it longways and put the hose
over the edge.
Step - 4
Install the pipe and filter. You are going to want to test fit the filter
on the pipe and test fit the pipe in the hole to make sure you do not need
to make the hole larger. If everything fits good, tighten the filter on and
tighten the other end of the intake pipe either onto the turbo inlet or the
throttle body. I use a bracket to hold the pipe in place. You can see it somewhat
in the pic below. It is red and is sitting in the black area just to the right
of the hole. if you look closely at the pipe, you can see the hose clamp that
holds the pipe to the bracket. Brackets are available too - price to be determined.
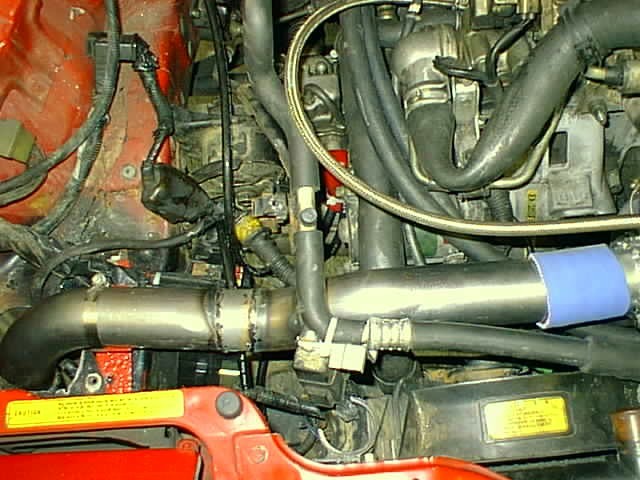
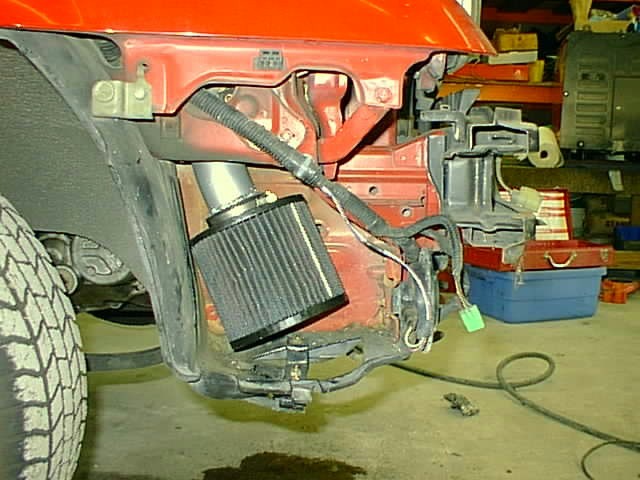
The next pic is a shot of the filter in its new home. It is mounted to the
intake pipe.
Now just put the bumper cover back on and mount the coolant reservoir if you
want to and you are done. Another thing about this mod is that the sounds
coming from the filter bounce of the ground and sound very loud. Even the
air being sucked into the filter on a non-turbo car sounds good.
Pic of my LudeSpeed fresh air intake:
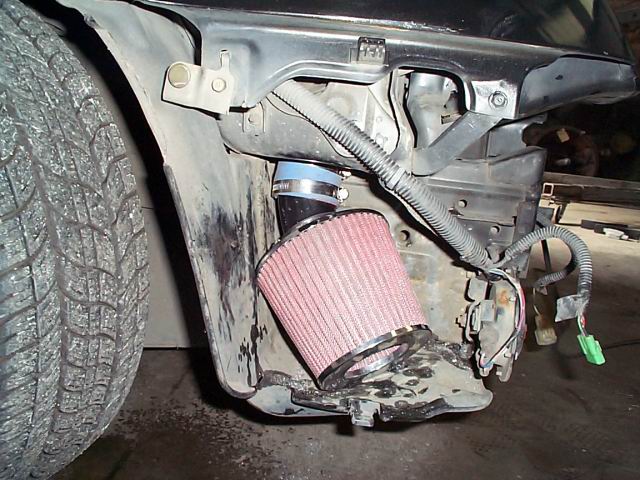
Im in Washington state so im not going to make the scoop till summer, and
I also used a larger airfilter which was a pain in the ass to make fit.