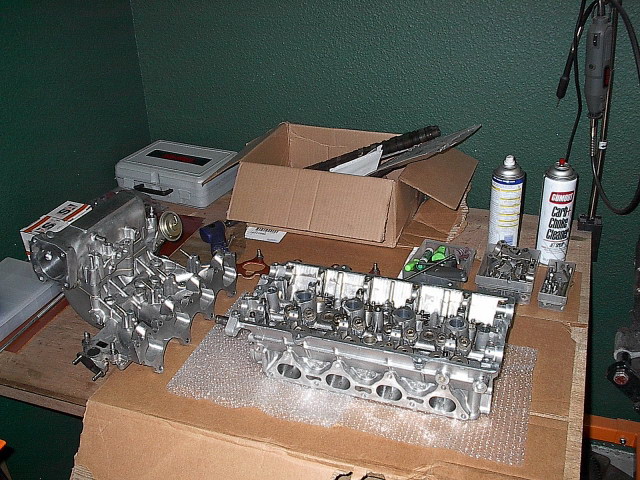
Had machine shop clean head and remove valve guides for me:
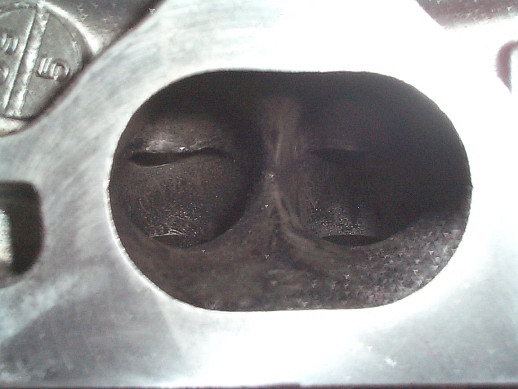
Intake side before work, if you look down by the valve seats, that's where they need the most work. If you stick you finger in from the cylinder side and feel the short turn radius there is a large "ledge" that must certainly interrupt air flow.
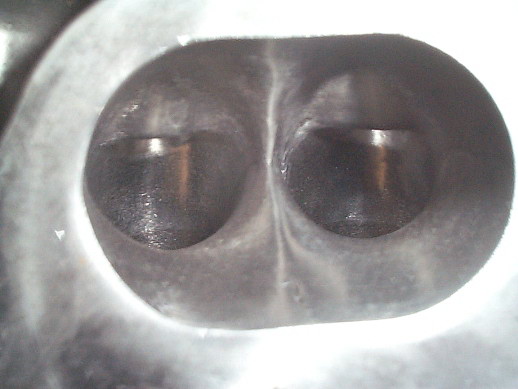
Here's after I finished, I'm not going too crazy with this head so it wasn't ported very much. I first roughed up the inside of the port with a carbide bit making sure to take very little off the divider, and also reshaped the short turn radius so the "ledge" was mostly gone. After that I used various sizes of 80grit cartridge rolls to smooth out the carbide work and get the final shape of the short turn radius. The valve seats have also been blended into the port walls. Only thing I will have to do it match the opening with the intake manifold after I finish it.
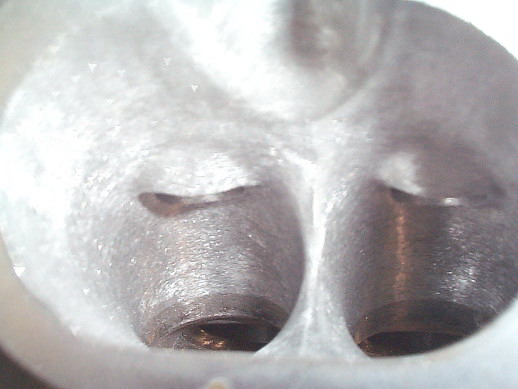
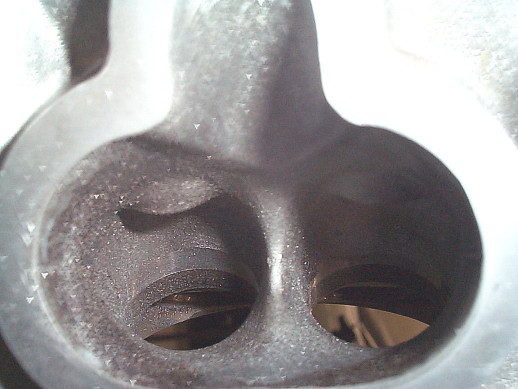
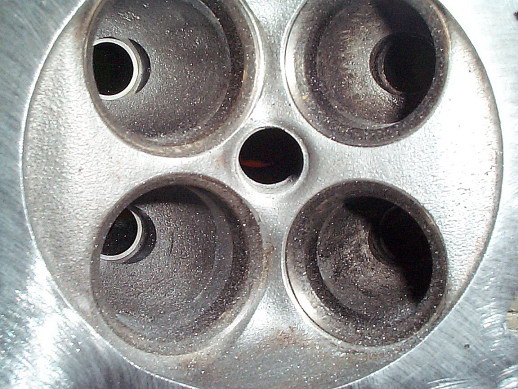
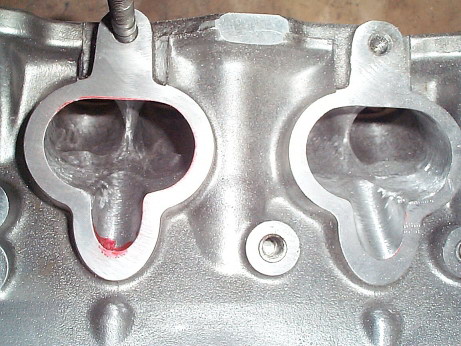
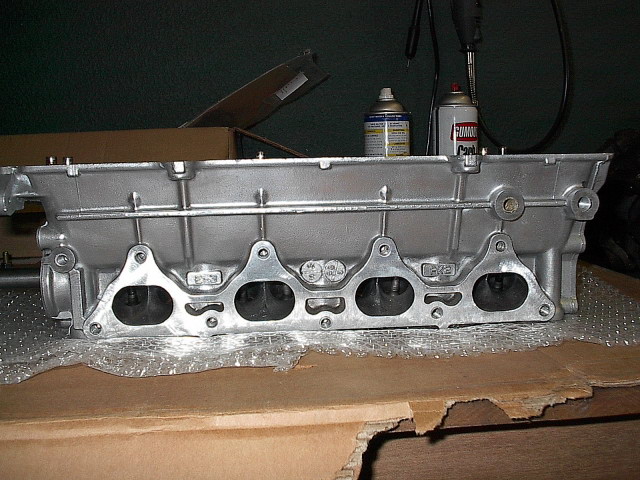
Exhaust has pretty much the same problem areas as the intake.
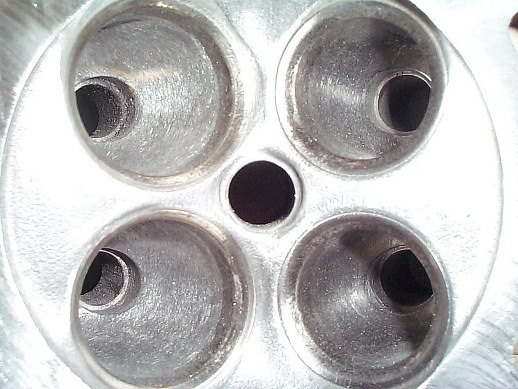
For this I first roughed it up and shaped it with the carbide bit, made the center divider come to a dull point and blended the seats into the walls again. Next I went over it with 80 grit rolls, and then 120 grit rolls. Finally I used the crossbuffs, polished it with the medium buffs then finished with the very fine buffs:
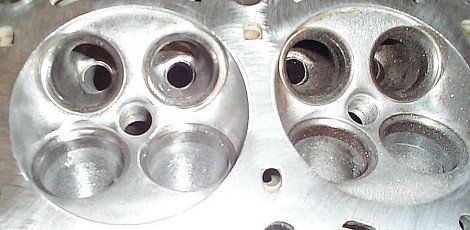
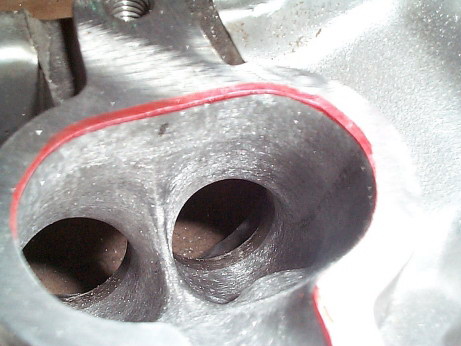
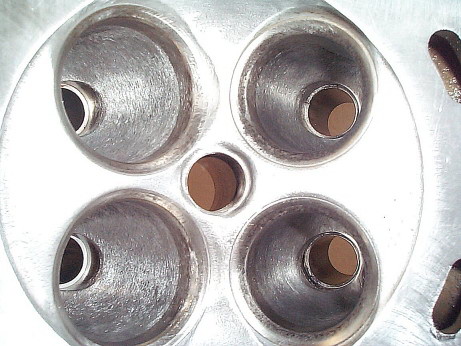
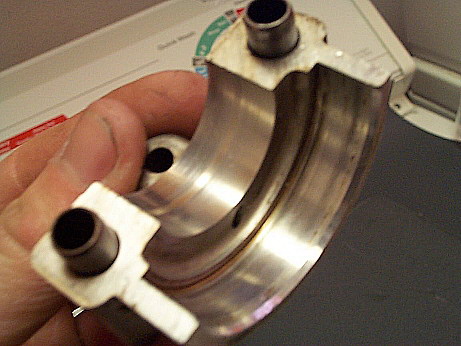
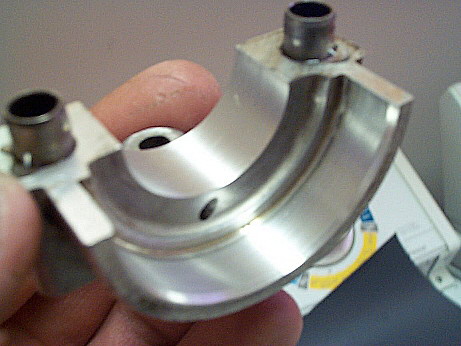
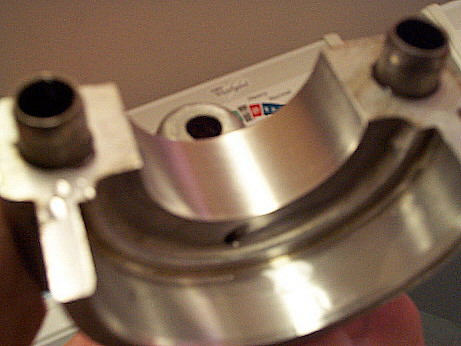
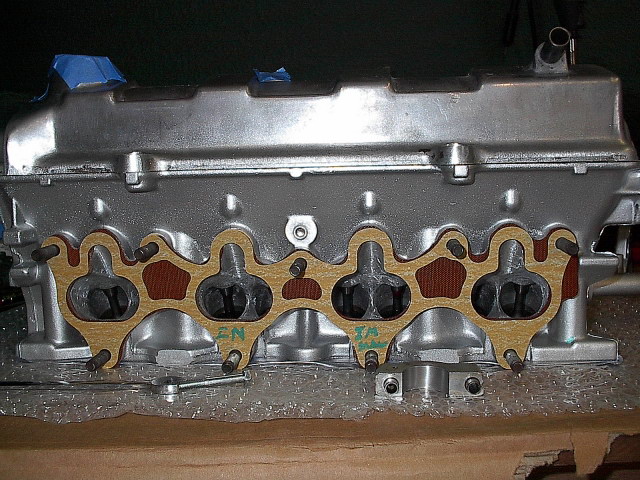
Here's inside the cylinder. This head had some small pitting in the cyl.
Here's after I finished, lightly went over the inside of the cyl with a grinding stone to smooth it out. Blended the inside of the cyl with the valve seats, so there is little or no "lip". Finally I used a coarse crossbuff to smooth it all out.
Another view left one is done and right one is stock.
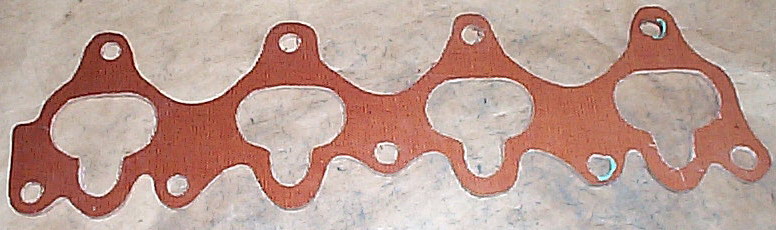
Here's a heat resistant gasket I make for the intake manifold. I first made a new gasket off the manifold with the gasket making stuff you can get at auto stores, then set that on the garolite and traced around it. After that I just cut it out.
If you want some of this stuff so you can make your own I bought this from http://www.McMaster.com, Here's my order:
Part# 8491K12 Grade Ce Garolite Sheet 1/8" Thick, 12" X 12" $6.18
Part# 8491K13 Grade Ce Garolite Sheet 1/8" Thick, 12" X 24" $12.00
Merchandise $18.18 Shipping $5.25
Your credit card will be charged $23.43
The 12"x24" is for the manifold gasket, and the other sheet is for misc stuff:
Here are some pics of it installed with the stock manifold studs, there isn't much room left on the studs and I would want to run 2 new gaskets on either side of the garolite which would take up a little bit more space still:
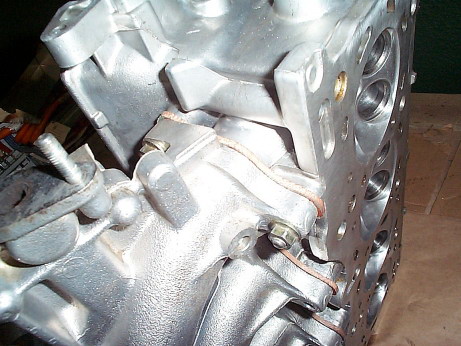
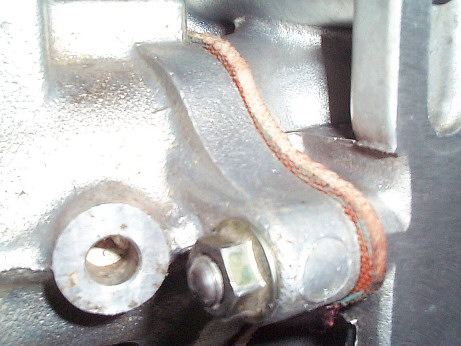
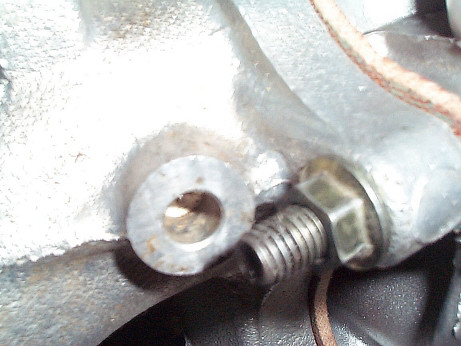
Since I don't want to risk having the nuts come off I decided I needed to put in longer studs. Don't worry the ones you need are easy to find, just use 9 new studs from the exhaust side. They are the same thread just like 1/4" longer which works out good, you could even run a thicker heat resistant gasket:
Next was to match the manifold-to-gasket-to-head.
I bolted the garolite onto the manifold and matched it to that first. After that I set it on the head and used a red marker to trace around the inside to see what material I needed to remove from the head to match it:
Here's after I matched the one on the right, the left ones still needs to be done:

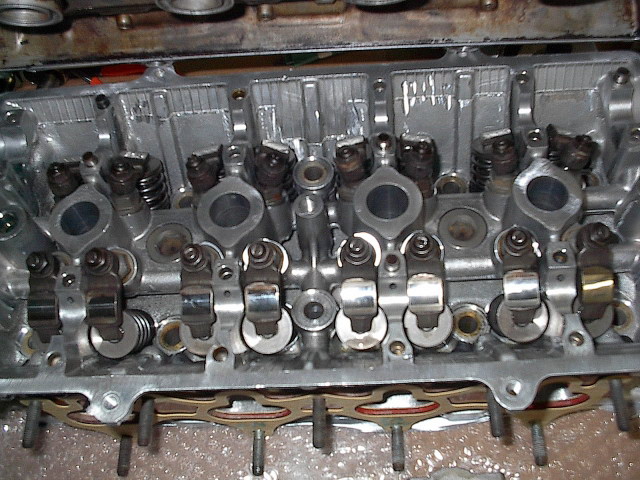
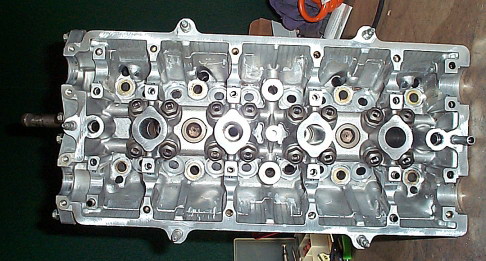
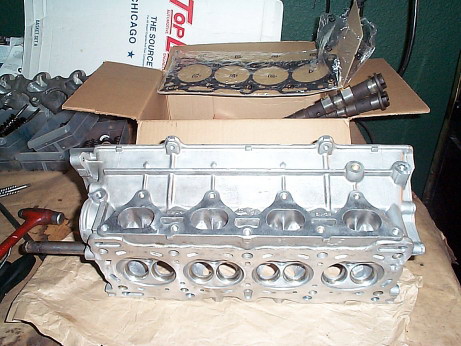
The head is pretty close to done, there just a tiny bit of touch-up needed still. Other things I did was deburr the coolant and oil passages on the head, then used various tiny wire brushes to clean the oil passages, etc.
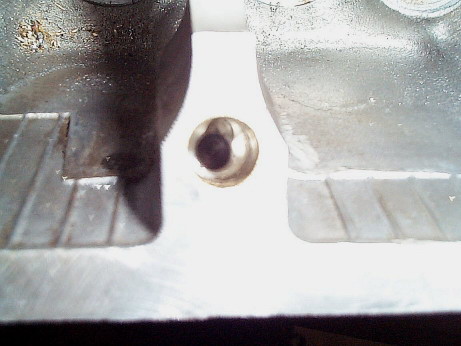
Well I was checking out the head and other parts for it and I realized one of the outer cam cap bolts was broken off down in the head. I did this while loosening it a few years ago after the b20a swap and forgot about it. Turned out to be a major problem, tried drilling it out and using screw extractors.. Broke 2 of of them off IN the head and they got stuck as well! Major problem, well me and my dad spent the rest of the day messing around with it to no avail. I gave up hope and was ready to start looking for another head.
Went into the shop the next day and I had given up hope on fixing it, and decided I was just going to get them out whatever it took. I grabbed my die grinder and round burr (which was just big enough to fit into the hole) and just ground straight down into the head till I had eaten through the broken extractor and most of the bolt. What was left of the bolt and other extractor I was able to get out with a pick. After all this the cam cap dowel hole was to big to fit snugly around the dowel and there was only like 1/8" thread for the bolt left at the bottom.
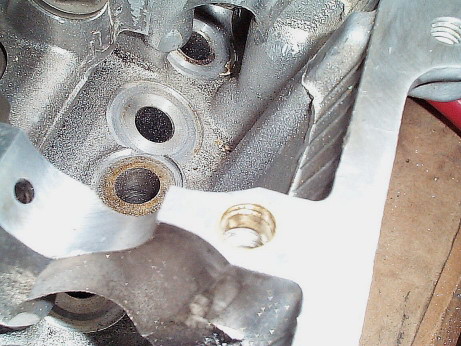
I used a drill press and drilled the bolt hole down another 1/4" inch or so and rethreaded it. Then to fix the dowel hole my dad came up with the idea of tapping it for a brass air line fitting, screwing the fitting in, grinding it level with the head then drilling it to the right diameter for the dowel. Worked like a charm! Now all I need is a new cam cap bolt that is 1/4" longer and I'm in business.
Here's the pics, a little bright but you can see the brass fitting. In the first pic you can also see in the hole where my initial attempt at drilling out the bolt went off course:
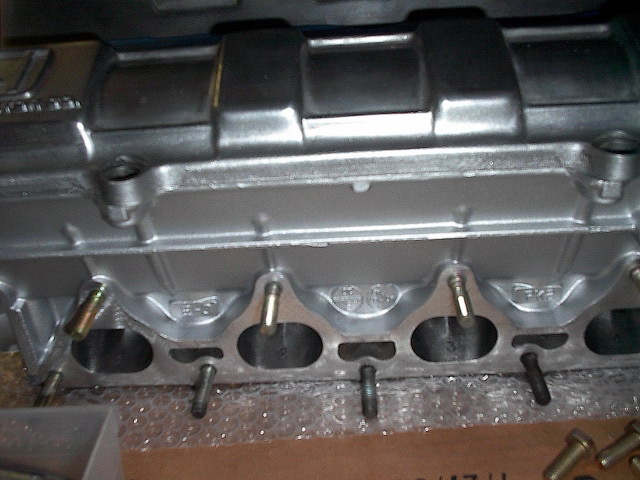
The head had been sitting in my garage for a few years with other parts laying on top it and I noticed a few minor nicks and burrs in the camshaft seats. I decided to clean them up a bit by hand by wet sanding them.
Set the head in big plastic sink and ran warm water over it. I used little torn off squares of wet sand able sandpaper to clean up the seats. Starting with 220 grit to get the tough burrs etc. Then I switch up to 400 grit to remove the 220 scratches, after that I finally went over them all with 1500 grit to get them nice and smooth. You don't really want to sand the seats with 220 more than you need to to fix the burrs btw.
Next I did all the caps the same way.
Here is before any work, you can see where the seat is worn:
Here is after hitting it with 220, nice and clean:
This is after 400:

After 1500 (Yeah can't really see much difference from the 400 in the pics):
Once your done be sure to dry anything on the head that isn't aluminium, it will rust.
Head back at the shop:
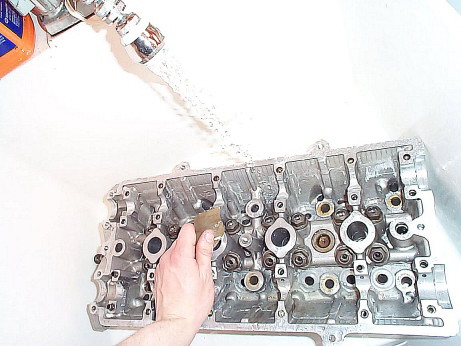
Sent the head back to the machine shop. Surfaced, 3 angle valve job, new guides, springs and retainers installed. Then another clean.
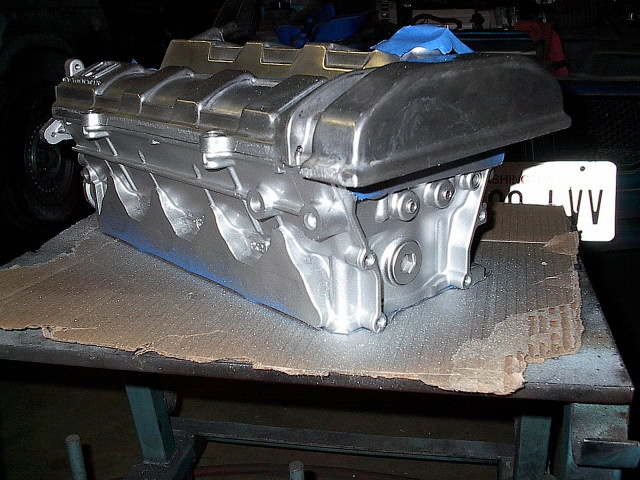
At this stage the head and mani are really close to being done:
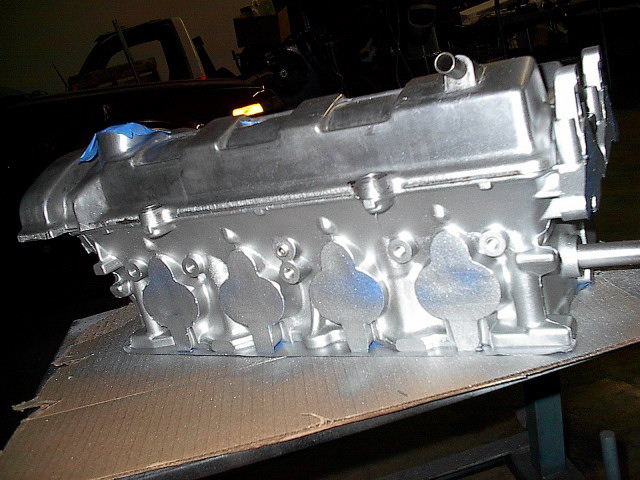
Well after trying several things to get the aluminium looking new there was still some discolouration etc. So I decided to paint it with 500 degree aluminium paint:

Matching IM gaskets and garolite spacer:
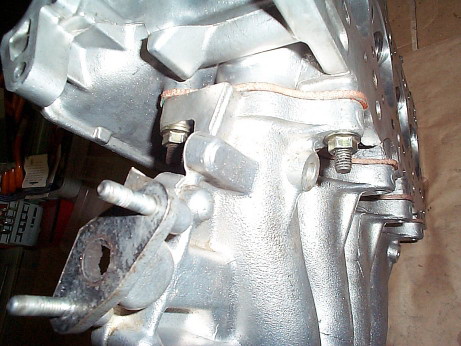
Exhaust side, some new studs:
Installed followers: