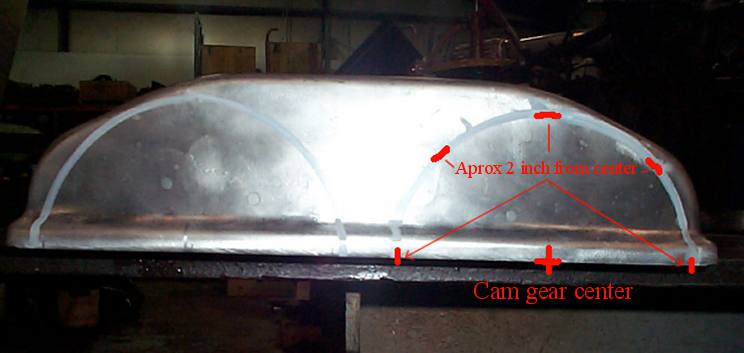
On the left you can see where I make a little scratch in the cover to show the center of the gear, and on the right I've got a little diagram.
Valve Cover Cam Gear Cutouts
By: MustardCat
Link to this page:
BACK TO PRELUDE3G.COM HOME
This mod not only looks good, but is also functional allowing you to adjust the settings on adjustable cam gears without going through the hassle of removing the valve cover and timing belt cover.
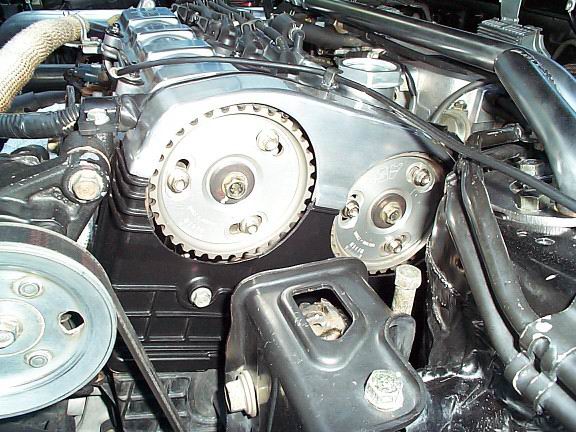
First remove the valve cover, you will see that where the valve cover and plastic timing belt cover meet happens to go right over the center of the cam gear bolt, which is excellent because you will only need to mark the center of the gears horizontally.
Remove the plastic timing belt cover. Set the valve cover back on the head and mark where the center of the gears are on it. It's important to be precise when making the marks because you will be basing all the rest of your measurements off them.
Our cam gears have an approximate diameter of 4 inches, so measure 2 inches from your center marks and make a mark on either side for referencing purposes.
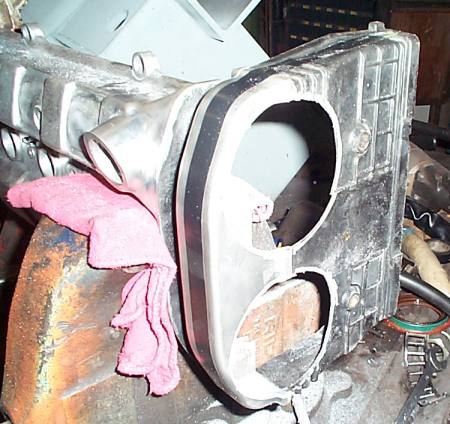
On the left you can see where I make a little scratch in the cover to show the
center of the gear, and on the right I've got a little diagram.
Now you need to find something you can use to trace 4 inch circles with, you also need to be able to center it where the gears would be easily. Here's some things that might work:
Stock cam gears.
Large compass, might be hard to keep it centered on the valve cover though.
I managed to find an old metal bearing in our shop that was just the right size and used that.
Get some tape, any type will do really, now tape over the top of the valve cover and hold the plastic timing belt cover where it would be in the car and wrap the tape all the way around it as well.
Now get a permanent marker or what I used which was a white "paint pen" then take care to get your preferred device centered on your original cam gear center mark and trace around it.
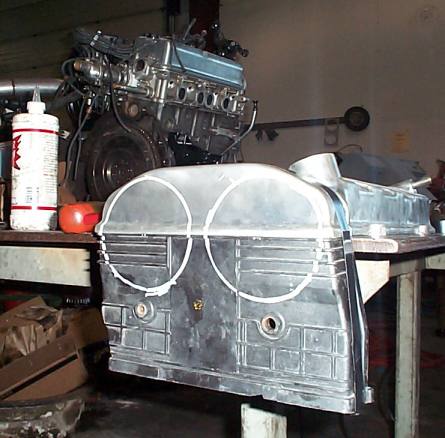
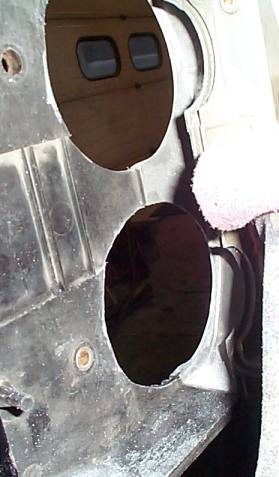
Here's right after I traced where I would cut, also notice how I have the tape
holding the 2 pieces together.
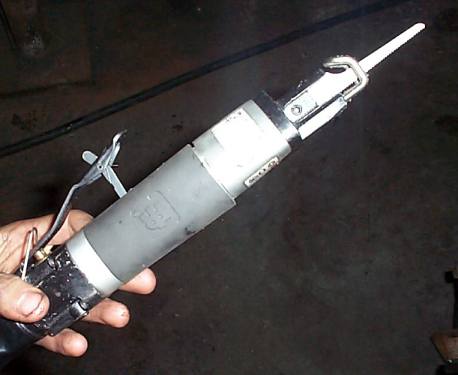
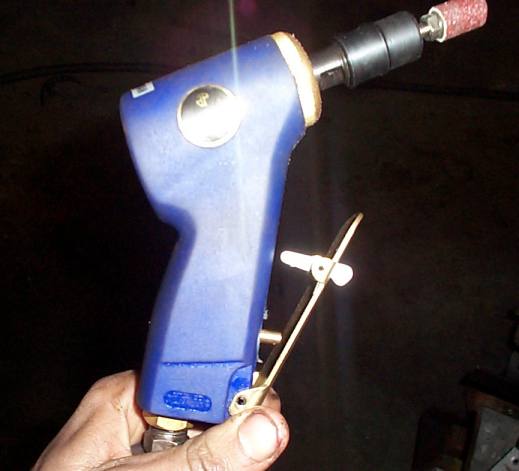
Now it's time to start cutting! You will need a saw similar to this:
And something like this for sanding:
Now stick the plastic cover in a vise.
The trick is to use the saw to cut out the big chuck of material leaving some room for error around where you traced. Next use the sanding wheel to precisely follow the outline. Taking you time and attention to detail at this step will really help because you don't want cutouts that are off-round or oval.
Be sure to cut the plastic timing belt cover first to get some practice because if you screw up this part it's easier and cheaper to replace than the valve cover if you mess it up.
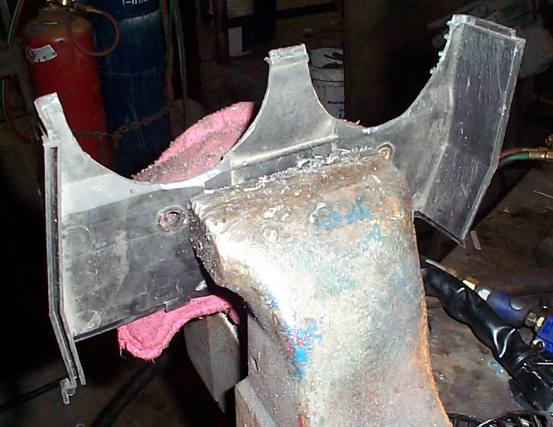
After the using the saw to take out most of the center, the edges are still
crude and not very round.
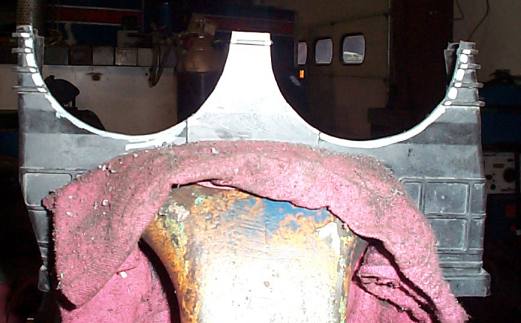
Here's after I used the sanding wheel to make it as round as I could by eye
without removing too much material.
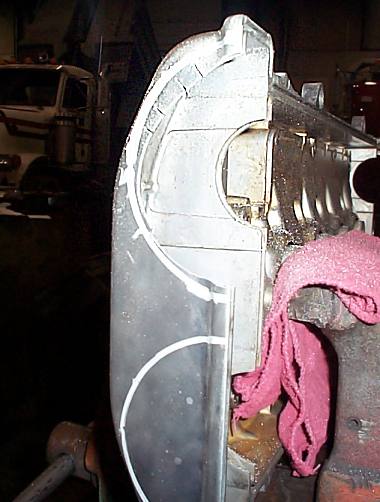
Now the valve covers turn, stick it in the vise but use rags on either side so the vise doesn't damage the surface. Don't over tighten the vise only tighten it as much as you need to, to make the cover stay put.
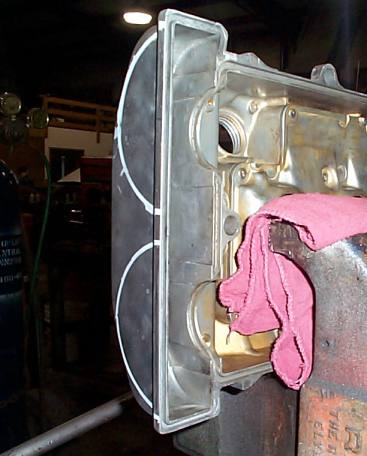
Clamp it close to the cam gear end for better stability during cutting.
Ok now your ready to cut the valve cover but first I need to warn you. The cover is made of aluminum, which is weak compared to other metals. It's also BRITTLE, which means instead of bending it will just snap in half and ruin your day, just keep this in mind while your working with the cover.
You use the same procedure for cutting the valve cover, it will just take longer because its made of metal instead of plastic. It also likes to eat sanding wheels so make sure you have a few extra.
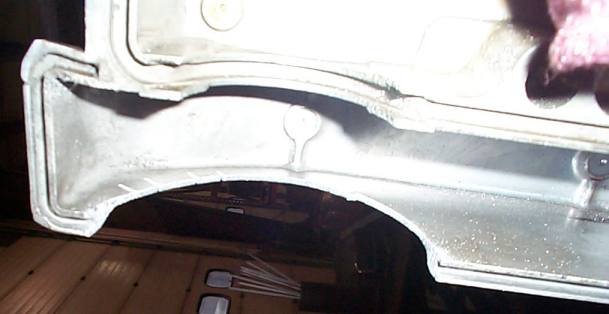
First crude cut, if you look close I cut some straight lines inward which seems
to help when using the saw to make bends.
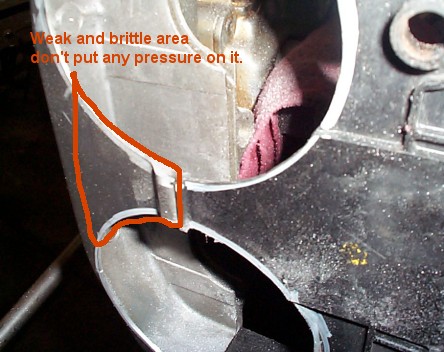
After cutting out the second gear hole you have to be VERY careful to never
push or pull on this spot, it's imperative.
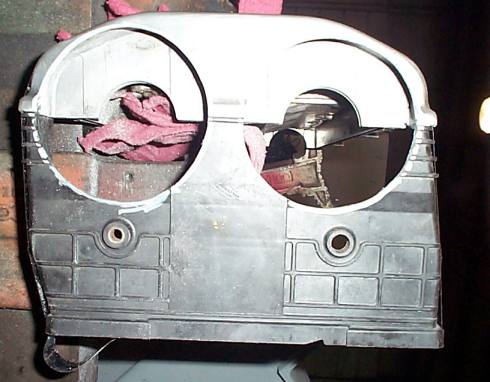
After rounding them as good as I could by eye with the sander I taped the 2 covers back together and did the final touch up of the two, to make sure they matched up well.
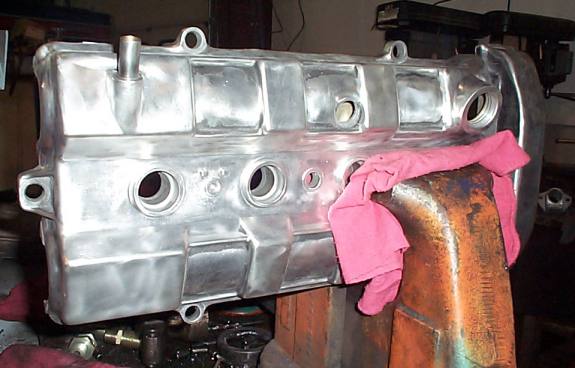
Finished! Looks pretty good in my opinion, afterwards you should get some different grits of sandpaper and hand sand the cut surfaces smooth and work out any remaining inconsistencies. Also don't forget to thoroughly clean the valve cover before reinstalling it on the car, don't want any aluminum shards getting into the valve train. :-)
Ok, here is the finished product: